
weeks 11-12
Background


This is a quick background that I made using the reference panoramic photos that I took earlier during the project.
I have realised that I will be unable to do all the backgrounds fro the animation on time and with the quality that I want them to be, however, I did want to experiment slightly in photoshop, with some things I have learned about photoshop.
I wanted with a background that doesn't have much linework and is mostly blended, and that way make the animation stand out.
My original plan was to make a background so I can test it with the first scene. At this point, I knew that it was a mistake to start with the animation and then the backgrounds. I should have started with the backgrounds first and then I should have animated the character according to the background, and not the other way around.
I used a regular brush to add the colour, and then I used the smudge tool a lot to get the blended effect and to simply make sure that I don't have any defined lines. I would often eyedrop the colours I need from the reference image I had.
A few months ago I got sent a set of concept art brushes with a variety of interesting brushes. I had brushes shaped as trees, branches and leaves, and I used those to create the bushes on the left side of the background. I used different shades of green to create volume and shadow. There were also some cloud brushes, that looked quite good so I tried them, and they worked really good.

This is the reference I used when I was doing the background. Unfortunately, I was unable to find the like to the website I got it from because I got this image quite some time ago.
When I imported the JPEG of the photoshop file to animate, I used the camera tool to relocate and do the zoom in. When I played the first scene, the character animation and the background were not matching. I tried adjusting it and going back to the original file to change couple f things, but I knew that it would have not worked.
The last thing I needed to do to the animation was to add slight shading, but before that, I needed to do the final linework on the eyes in scene 1.
I started by drawing very simple eyes nose, mouth and eyebrows, using the ones in scene 4 as a reference, since there the face worked out quite successful. I know that in scene 4 I didn't draw any eyebrows, but I had to here since I already did a tween of the head, and all facial features were part of the symbol used for the tween.

I used the same drawing of the face for all the poses, and I would just adjust them, enlarge them, or change their position slightly so they match the face position. Near the end, I had to erase and draw some parts again, like the nose for example, because I had to show the bridge of it. I used the paintbrush tool to draw the facial features, just to keep the lines neat and tidy.

After fixing the eyes, I had to fix a couple of things with the head tween. Firstly, when the head was going downwards, the colour and the lies of the jacket were going over the head lines layer and skin colour layer. I went to fix the colour first. I didn't use a tween but erased what I needed by creating a new frame, and just working in ones, because the tween had changed every single frame. I used this technique all other things I needed to add to the tween, as I thought that this would be the most simple and quickest way.


I also did the same with the linework of the jacket.
Then It was time to move on to the eyebrows and eyes. The space inside the eyes was actually not covered by the skin colour layer, so I created a new layer and dragged it to the bottom, under all other layers, and using the brush tool I drew big, black splat and made sure that the dot of the eyes was actually filled by the splat.

I had to create a couple of keyframes around where the black splat was showing, so I could erase the bits that were showing.
Once that was also finished I moved to the eyebrow. I created a new layer, and placed it above all other layers, in the 1st scene folder. I filled in the brow and when I got to the tween I once again worked in ones and with each new keyframe I would rotate the colour slightly using the free transform tool, so that it would fit inside the outlines of the eyebrow.
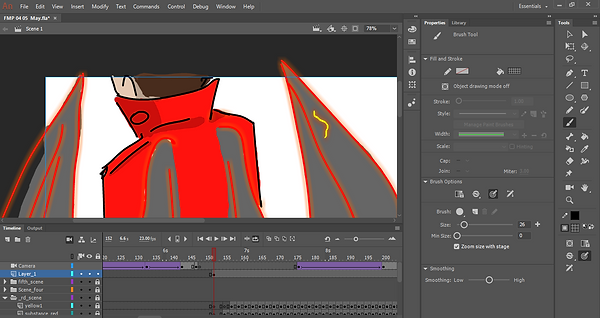
Shading
When I shaded I started with the scenes that I actually wanted to shade first because in a previous attempt I started with the beginning of the animation and felt very overwhelmed, and now I just want some diversity in the work,and I tried to avoid going in chronological order.
I referred back to the "How to animate transformation" tutorial. Even from the time when I watched it in order to add it to research I decided that I am going to use the shading technique from the video. I went to the place where I select colours from, and I clicked on the one that is for the brush tool ( there is one for the paintbrush tool and one for the brush tool), and then I went to "alpha" on the top of the panel and refused it down to 20%. Then I choose black, and I was ready to go.
All of the shading for all of the scenes was on the same layer, which I placed above all other layers and folders initially.


I choose to shade only the most necessary bits. I didn't want to have too many shadows. I looked up some references for simplistic shading to just give me an idea which are the most important bits. I went ahead and started with scene 4. I shaded the jacket the palm, lower bits of the hair, and the parts of the face covered by hair, the nose, the inner side of the collar and the neck where the head locks the light.


Then I moved on to scene 5 because I was slightly more excited to add shading to this scene and the others. Here since I had the scene starting with a fade-out I had to chose to start from a place where the dragon starts getting more visible.
I shaded the from and the back leg that were on the other side, the neck and under the horns, and also the place where the wing is bent, to make sure it is obvious that the wing is folded there. Also, I added a light shade under the "shoulder" of the wing, and a bit on the tail where it is covered by the leg.
Scene 4 was the fastest and quickest scene to shade. I added a little on the collar, to show it's bent, a little under it, a bit on the bents of the sleeves of the jacket, a bit on the foods of the trousers.

I had to add a couple of keyframes to adjust the shading on the trousers once the tail started "opening". I had to erase bits where the shading was too much, and add when gaps appeared.
Then I moved to scene 1 and shaded exactly the same bits as in scene 4, however here the hair was slightly more different than in the later scenes, this is because I was working on the animation, I changed the hairstyle slightly because I didn't like this one, but since the animation was already done, I had to keep it, but I don't think it is such a big issue. When I got to the tween I once going worked on ones like when I was filling the eyes and brows with colour.


Finally, I got to scene 2. I added all the same shading from scene 1 and 4 but only what's visible from the back view, and the trousers shading from scene 3. Here because of the wings, I had to do a lot of erasing then fill what I erased again. erasing was easy I just had to get rid of what was extra, but when It came to filling in again I used the brush tool to fill the small bits. When It came to the big ones like the hair, I went back to my first frames copied what was on there and there pasted it on the new keyframe, moved it where I needed it, erased what I didn't need, and moved on to what was next. I used this technique to make sure that the shading stayed the same and was where it was supposed to.
I played the animation couple of times to see if I was happy, and then I went to render it. I went to "file" -> "export" -> "export video". Then I opened Adobe Media Encoder placed the file in the panel, in order to convert it. I found H.246, selected 1080p HD ( I will try there options like 2160p 4K to see how that works ou, ut I am pretty sure 1080p is the one for my animation), then I pressed the green play button and converted it. I played the animation rendered and saw there was a slight problem with scene 5 where the shadow is absent, and then suddenly appears. I went back and fixed that (What and how I did it is going to be in Problem solving).

I repeated the same process and this time it worked out great and I was happy with how it looked.

This the rendered animation.