
Practical Skills
Drawing 1 and 2 point perspectives
21/01/2019

2 points perspective:
The 2 p.p. has two vanishing points on the horizontal line. I drew a cuboid in the middle and then drew another one next to it.
1 point perspective:
I used a ruler to draw the guidelines and the buildings. I tried to make shapes of different sizes and also tried to use the same principal to make human- like shapes that become bigger the further they are from the vanishing point

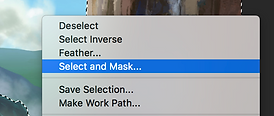
Selection and Masking
22/01/2019
We had a similar tutorial before the Christmas but this time we more on it. To start I imported an image that I like and then use the quick selection tool select the ares I want.
Then click the right button, and then click on "Select & mask". There are different settings you change like the transparency. When that is done I went to 'output to' and clicked 'New layer with layer mask".
After this to adjust the image I click on the black and white version of the masking and the use the brush tool and the eraser tool.


Animation (rock falling)
28/01/2019
Today we had a little workshop on how to animate a rock falling dow an hill. First I used the pencil tool to draw the hill, then I changed layer's name to 'hill'. Then I created a new layer and named it 'rock'.
I used the pencil tool again to draw a rock, then I marked it using transformation tool and went to Modify on the top of the screen and clicked 'convert to symbol'.
I started the animation by moving the anchor point to the surface or the rock that was touching the hill, and started rotating it little by little and every time I was about to rotated I clicked F6 to create new key frame.


Thaumatrope

Textures, filters and actions.
31/01/2019
I imported I photo in photoshop and made sure the the resolution is 300 ppi. Then I went to the top of the screen and went to 'filter' and clicked on "filter gallery". There I had lots of different filters to choose from.


Also I tried to select a single thing from the image using the selection tool so can apply the filters single area.


Presenting 2D in 3D


I used polygon plane to make the layers and rotated the to 90 degrees. Then I created a camera, and later on used a camera and aim. I moved the camera from the start point to the point I wanted the animation to end. I pressed "S" to create a key frame then moved to a point in the time line I wanted the animation and pressed "S" again. Then I moved the camera to where I wanted it to go and pressed "s" again.


Human anatomy


The videos I watched about the human anatomy were very useful to me. I think that after then my character sketches look a bit more realistic in the body. And after some practise the time it took to draw a character stated to decrease rapidly, which I am very grateful for as I think that making fast, good quality sketches is very important in the workplace.
I think that after I have learned how a realistic body should roughly look like I can change the style as I please or when necessary.